Mastering Bodyweight Fitness: First Pull-Up in 3 Months
Advertisements
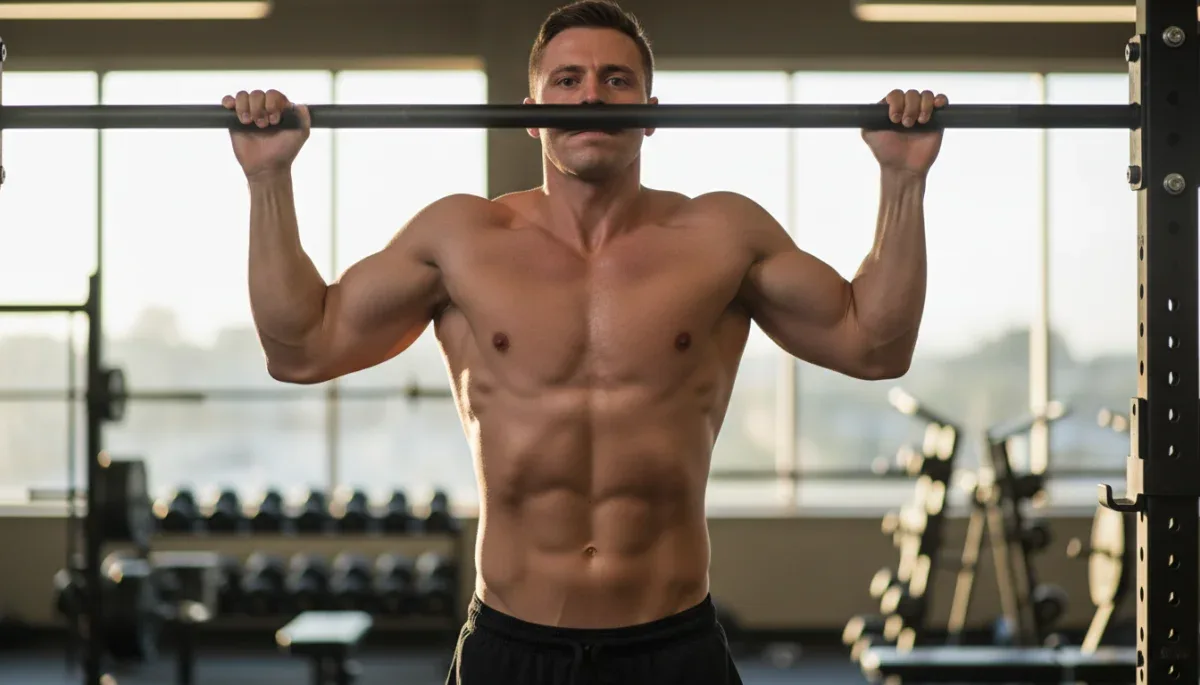
Achieving your first pull-up within three months is an attainable goal through structured bodyweight fitness progressions, focusing on consistent effort and proper technique to build foundational strength.
Embarking on the journey of Mastering Bodyweight Fitness: 4 Progressions for Achieving Your First Pull-Up in 3 Months can be a transformative experience, unlocking new levels of strength and confidence. Many aspire to conquer the pull-up, a benchmark of upper body strength, yet often feel daunted by its perceived difficulty. This guide offers a clear, actionable roadmap, breaking down the seemingly impossible into manageable, progressive steps to help you achieve this significant fitness milestone.
Understanding the Pull-Up: More Than Just Arms
The pull-up is a compound exercise that engages multiple muscle groups, making it a powerful indicator of overall upper body and core strength. It's not merely about arm strength; your back, shoulders, and even your core play crucial roles in executing a perfect pull-up. Understanding these mechanics is the first step toward building the necessary strength.
Many beginners mistakenly focus solely on their biceps, leading to frustration and slow progress. A true pull-up primarily targets the latissimus dorsi (lats), the large muscles of your back, with assistance from your biceps, forearms, and shoulders. Proper form involves initiating the movement from your lats, pulling your chest towards the bar, and controlling the descent.
The Kinematics of a Pull-Up
A pull-up involves a complex chain of muscle contractions and joint movements. It starts with a dead hang, where your body is fully extended. As you pull up, your scapulae (shoulder blades) retract and depress, engaging your lats. Your elbows flex, bringing your body upward. The core must remain stable throughout to prevent swinging and ensure efficient force transfer.
- Scapular Retraction: Essential for engaging the back muscles.
- Elbow Flexion: Primarily driven by the biceps and brachialis.
- Core Engagement: Stabilizes the trunk and prevents compensatory movements.
- Controlled Descent: Builds eccentric strength, crucial for injury prevention and muscle growth.
By dissecting the movement, we can identify specific areas to strengthen, making the path to your first pull-up clearer and more direct. This foundational understanding ensures that your training efforts are targeted and effective, avoiding common pitfalls that hinder progress.
Ultimately, the pull-up is a testament to functional strength, translating into improved posture, better grip, and enhanced overall athletic performance. It demands coordination and consistent effort, but the rewards are significant, extending beyond just the ability to lift your own bodyweight.
Progression 1: Building Foundational Strength with Inverted Rows
The journey to your first pull-up begins with exercises that mimic the pulling motion but allow for adjustable resistance. Inverted rows, often called Australian pull-ups, are an excellent starting point. They help build the foundational back and bicep strength required, while allowing you to control the difficulty by adjusting your body angle.
To perform an inverted row, find a sturdy bar or a Smith machine set at waist height. Lie on your back underneath the bar, gripping it with an overhand grip slightly wider than shoulder-width. Keep your body straight from head to heels, engaging your core. Pull your chest towards the bar, squeezing your shoulder blades together, then slowly lower yourself back down.
Adjusting Difficulty and Form
The steeper your body angle, the harder the exercise. Beginners can start with a higher bar or bent knees to reduce the load. As your strength improves, you can lower the bar or extend your legs fully. Focus on maintaining a straight body line and controlling both the upward and downward phases of the movement.
- Higher Bar/Bent Knees: Easier variation for beginners.
- Lower Bar/Straight Legs: Increases difficulty as strength improves.
- Full Range of Motion: Ensure your chest touches the bar and you fully extend your arms.
- Scapular Retraction: Actively squeeze your shoulder blades at the top of the movement.
Consistency is key with inverted rows. Aim for 3 sets of 8-12 repetitions, gradually increasing the difficulty as you get stronger. This exercise directly translates to pull-up strength by reinforcing the pulling pattern and strengthening the crucial back muscles.
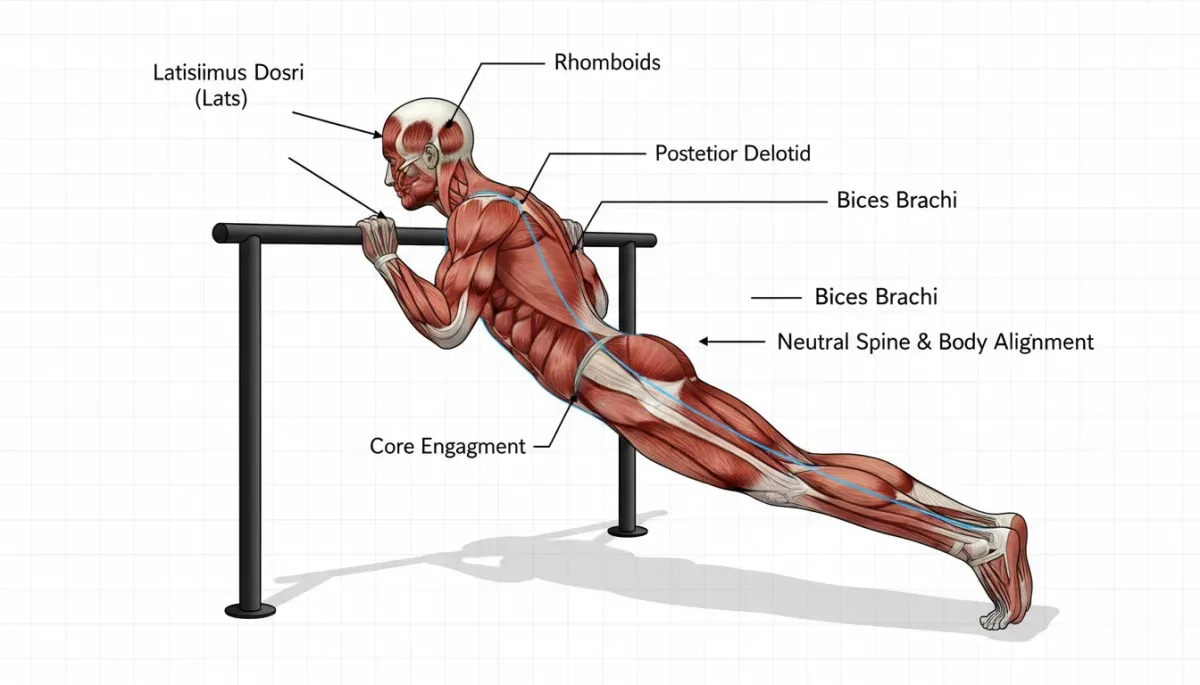
Mastering inverted rows will lay a solid groundwork, preparing your muscles and nervous system for more challenging progressions. It teaches you to engage your lats effectively, which is a critical component of a successful pull-up.
Progression 2: Enhancing Grip and Scapular Strength with Dead Hangs and Scapular Pulls
While inverted rows build overall pulling strength, specific exercises are needed to address grip strength and scapular control, both vital for pull-ups. Dead hangs and scapular pulls are your next essential steps, focusing on these often-overlooked components.
A dead hang involves simply hanging from a pull-up bar with an overhand grip, arms fully extended. This exercise strengthens your grip, forearms, and shoulders, and helps decompress your spine. Start by holding for 10-20 seconds and gradually increase your hold time. Aim for 3 sets of maximum hold time.
Mastering Scapular Pulls
Scapular pulls, also known as active hangs, teach you to engage your back muscles without bending your elbows. From a dead hang, initiate the movement by depressing and retracting your shoulder blades, lifting your body up an inch or two without bending your arms. Hold briefly, then slowly lower back down. This movement isolates the initial phase of a pull-up, crucial for proper muscle activation.
- Dead Hangs: Focus on grip endurance and shoulder stability.
- Scapular Pulls: Isolate lat activation and teach proper pulling initiation.
- Controlled Movement: Avoid swinging; focus on deliberate muscle engagement.
- Progressive Overload: Increase hold time for dead hangs and repetitions for scapular pulls.
Incorporate 3 sets of 8-12 repetitions for scapular pulls into your routine. These exercises, though seemingly small, are incredibly effective in building the neurological connection between your mind and your lats, teaching your body how to initiate the pull-up correctly. Strong scapular control prevents shoulder impingement and ensures that your back muscles are doing the primary work.
By dedicating time to dead hangs and scapular pulls, you're not just building strength; you're refining the motor patterns necessary for an efficient and powerful pull-up. This targeted approach addresses specific weaknesses that often prevent individuals from achieving their first full pull-up.
Progression 3: Negative Pull-Ups for Eccentric Strength
Once you have a solid foundation from inverted rows, dead hangs, and scapular pulls, it's time to introduce negative pull-ups. Negative pull-ups focus on the eccentric (lowering) phase of the movement, which is often stronger than the concentric (pulling up) phase. This exercise builds significant strength and muscle memory for the full pull-up.
To perform a negative pull-up, start at the top position of a pull-up (with your chin above the bar). You can achieve this by jumping up, using a box, or having a spotter assist you. Once at the top, slowly and controllably lower yourself down until your arms are fully extended. The slower you go, the more effective the exercise will be in building strength.
Technique and Application
Focus on controlling the entire descent, aiming for a 3-5 second lowering phase. Maintain a tight core and keep your shoulder blades engaged throughout. If you can't control the descent for at least 3 seconds, you might need to spend more time on the previous progressions.
- Slow Descent: Aim for 3-5 seconds to maximize eccentric loading.
- Full Range of Motion: Lower until arms are fully extended.
- Consistent Form: Avoid collapsing or dropping quickly.
- Repetition and Sets: Perform 3 sets of 3-5 repetitions, with ample rest between sets.
Negative pull-ups are a powerful tool because they allow your muscles to experience the full range of motion under load, even if you can't yet pull yourself up. This exposure builds both strength and confidence, preparing your body for the complete movement. They are a direct bridge between assisted exercises and the unassisted pull-up.
Integrating negative pull-ups into your routine will accelerate your progress significantly, as eccentric training is highly effective for muscle growth and strength gains. This progression is often the final hurdle before achieving your first unassisted pull-up.
Progression 4: Assisted Pull-Ups and Banded Variations
As you near your goal, assisted pull-ups and banded variations provide the necessary support to practice the full pulling motion while still building strength. These exercises allow you to perform more repetitions with proper form, reinforcing the movement pattern and increasing overall volume.
Assisted pull-ups can be done with a spotter who provides a slight push from your feet or back, or by using an assisted pull-up machine if available. The key is to receive just enough assistance to complete the movement with good form, gradually reducing the help as you get stronger.
Utilizing Resistance Bands
Resistance bands are a popular and effective tool for assisted pull-ups. Loop a strong resistance band around the pull-up bar and place one or both feet into the loop. The band will provide assistance at the bottom of the movement, where most people struggle, and gradually reduce assistance as you pull up. Choose a band that allows you to complete 3-5 repetitions with good form.
- Spotter Assistance: Gradual reduction of help to build independence.
- Assisted Pull-Up Machine: Provides adjustable counterweight.
- Resistance Bands: Offer progressive assistance, decreasing as you pull up.
- Focus on Form: Maintain proper technique even with assistance.
The goal with assisted pull-ups is to gradually decrease the amount of assistance over time. This could mean using a lighter band, using fewer fingers for a spotter, or reducing the counterweight on a machine. This systematic reduction of support directly leads to the ability to perform an unassisted pull-up.
These final progressions are critical for refining your technique and building the last bit of strength needed. They bridge the gap from partial movements to the complete, unassisted pull-up, making your three-month goal entirely achievable with consistent effort.
Integrating Nutrition, Rest, and Consistency for Success
Achieving your first pull-up in three months isn't just about the exercises; it's a holistic endeavor that requires attention to nutrition, adequate rest, and unwavering consistency. Your body needs the right fuel and sufficient recovery to adapt and grow stronger. Neglecting these aspects can significantly impede your progress.
Proper nutrition provides the energy for your workouts and the building blocks for muscle repair and growth. Focus on a balanced diet rich in lean proteins, complex carbohydrates, and healthy fats. Protein is particularly crucial for muscle synthesis, so ensure you're consuming enough to support your training demands.
The Importance of Rest and Recovery
Muscle growth doesn't happen in the gym; it happens during recovery. Adequate sleep (7-9 hours per night) is paramount, as this is when your body repairs tissues and releases growth hormones. Overtraining without sufficient rest can lead to plateaus, fatigue, and increased risk of injury.
- Balanced Diet: Fuel workouts and muscle repair.
- Protein Intake: Essential for muscle synthesis.
- Adequate Sleep: Crucial for recovery and growth hormone release.
- Active Recovery: Light activities like walking or stretching aid blood flow.
Consistency in your training schedule is non-negotiable. Aim for 2-3 dedicated pull-up training sessions per week, allowing at least 48 hours of rest between sessions for muscle recovery. Skipping workouts or inconsistent effort will prolong your journey to that first pull-up.
By prioritizing nutrition, rest, and consistency alongside your progressive exercises, you create an optimal environment for strength development. These elements are the silent partners in your success, ensuring that your hard work in the gym translates into tangible results and helps you confidently achieve your pull-up goal within the three-month timeframe.
| Key Progression | Brief Description |
|---|---|
| Inverted Rows | Build foundational back and bicep strength; adjustable difficulty. |
| Dead Hangs & Scapular Pulls | Enhance grip endurance, forearm strength, and crucial scapular control. |
| Negative Pull-Ups | Develop eccentric strength by controlling the lowering phase of the pull-up. |
| Assisted Pull-Ups | Practice full movement with reduced resistance, using bands or spotters. |
Frequently Asked Questions About Pull-Up Training
How often should I train for pull-ups?▼It is recommended to train for pull-ups 2-3 times per week, allowing at least 48 hours of rest between sessions. This frequency provides adequate stimulus for muscle growth and recovery, preventing overtraining and promoting consistent progress towards your goal.
What if I can't even do an inverted row?▼If inverted rows are too challenging, start with easier variations. Elevate the bar higher, bend your knees, or perform bodyweight rows with your feet on the ground, leaning back. Focus on building strength in these modified movements before progressing to standard inverted rows.
How long should I hold a dead hang?▼Beginners should aim for dead hangs of 10-20 seconds for 3 sets. As your grip strength improves, gradually increase the duration. The goal is to build endurance in your forearms and hands, which is crucial for maintaining your grip during pull-ups.
Can women achieve pull-ups as easily as men?▼Yes, women can absolutely achieve pull-ups. While men generally have higher upper body strength due to physiological differences, with consistent training and proper progression, women can develop the necessary strength to perform pull-ups. The principles of training remain the same for everyone.
What is the role of nutrition in pull-up progress?▼Nutrition plays a vital role by providing the energy for your workouts and the building blocks for muscle repair and growth. A diet rich in lean protein, complex carbohydrates, and healthy fats supports strength gains and helps your body recover effectively from intense training sessions.
Conclusion
Achieving your first pull-up within three months is a challenging yet highly rewarding fitness goal that is entirely within reach with a structured approach. By systematically progressing through inverted rows, dead hangs, scapular pulls, negative pull-ups, and assisted variations, you build the necessary strength, muscle memory, and confidence. Remember that consistency in training, coupled with adequate nutrition and rest, forms the bedrock of your success. Embrace the journey, celebrate small victories, and commit to the process. The satisfaction of conquering your first unassisted pull-up is an unparalleled testament to your dedication and the power of progressive bodyweight training.